
Connect Claude Code or Codex
Stenograf can give an AI assistant read-only access to your saved recordings over the Model Context Protocol (MCP). It is off until you turn it on, and each assistant gets its own access that you can narrow or revoke.
1. Turn on the MCP server
Open Settings → Integrations → MCP Access and turn on Enable MCP server. Its status should read Running.
2. Add the assistant
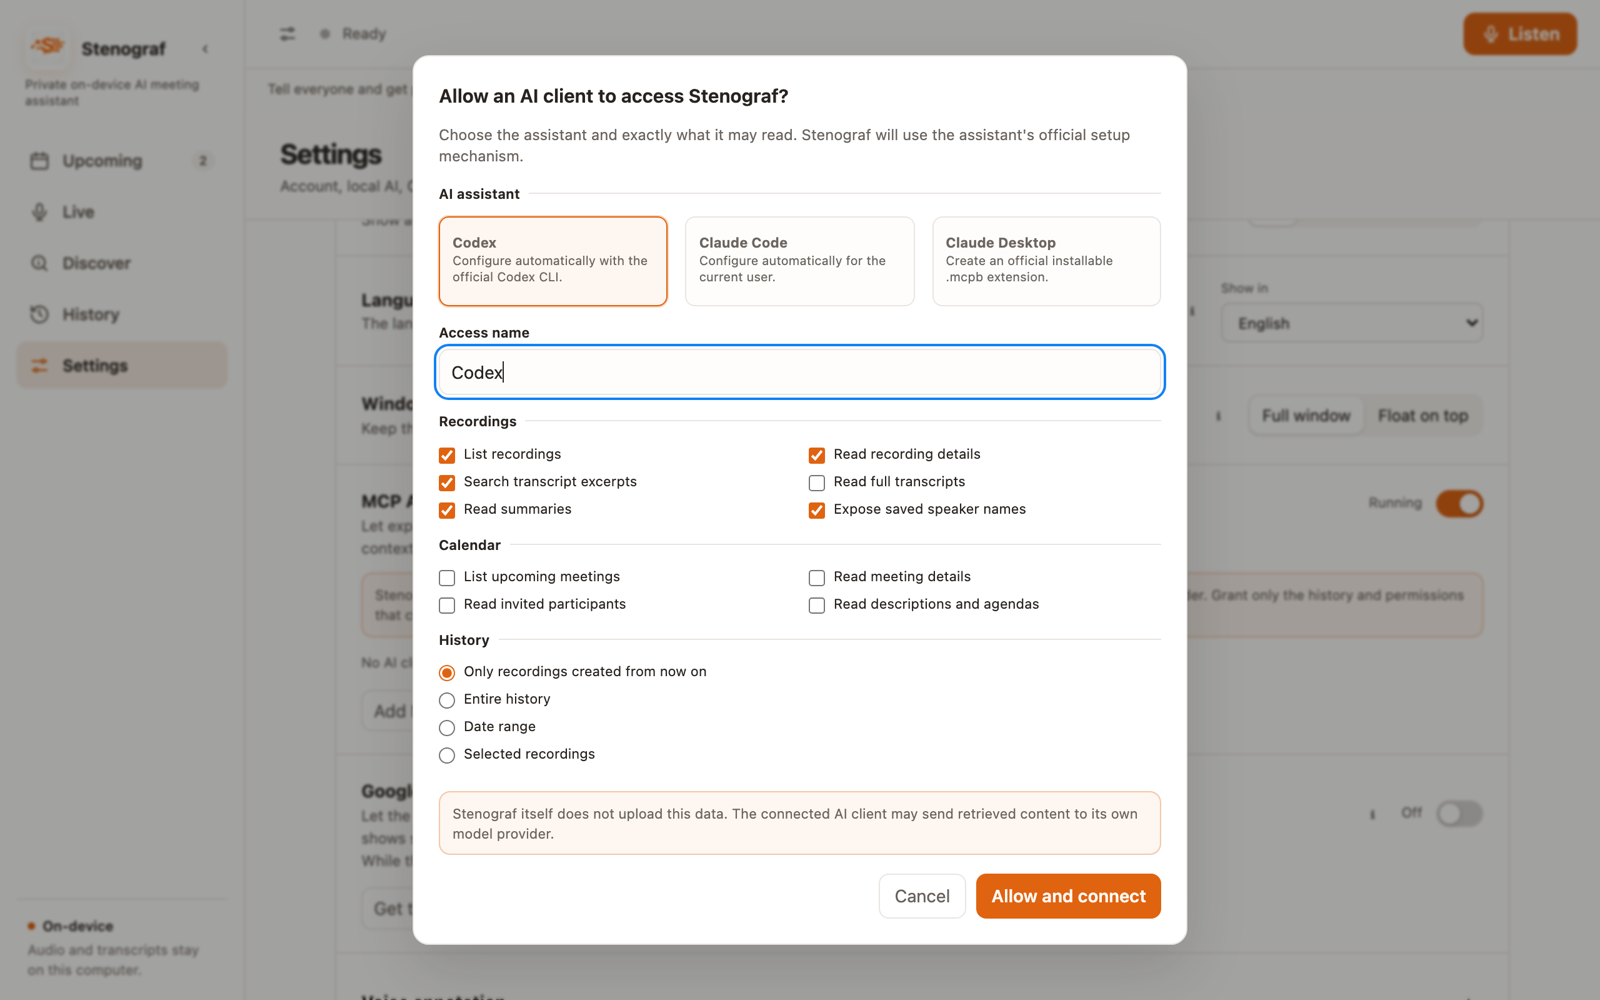
Choose Add MCP client, then Claude Code or Codex. Give the access a name, choose its permissions, and choose which recordings it may read:
- Only recordings created from now on — the recommended start
- Entire history
- Date range
- Selected recordings
Speaker names are a separate choice, Expose saved speaker names. When it is off, your own voice shows as Me and other voices as Speaker 1, Speaker 2 — in the transcript and in the summary, which names a speaker in every point it makes. Where a name cannot be replaced with certainty, such as two people sharing a first name, the summary is withheld from that assistant rather than sent partly redacted. Your saved summary keeps its real names.
Choose Allow and connect. Keep the window open until setup is complete: the access token is shown only there and disappears when you close it.
3. Finish in Claude Code
Stenograf finds the Claude Code command-line tool and registers itself for your user with Claude Code’s own claude mcp add --transport stdio --scope user command. Start a new Claude Code session, or run /mcp to check the connection.
3. Or finish in Codex
Stenograf registers itself with Codex’s own codex mcp add command. Start a new Codex task so it loads the server; a task that was already open will not see it.
If Stenograf cannot find either tool, install or update it and choose Try again. Claude Desktop works too: choose Save .mcpb, open the file in Claude Desktop, and paste the access token when it asks.
4. Ask
Stenograf must be running while the assistant uses it. Then ask in plain words, for example: find where the Atlas launch date was agreed and quote it, or list the actions from yesterday’s standup with who owns each. The assistant quotes what was said and can open the exact passage to check the wording. It can also read these help guides, so how do I bring my Otter meetings into Stenograf? is answered from Stenograf’s own words, offline, without touching your recordings.
What it can and cannot do
- It reads only what you granted: recordings, transcripts, summaries and meeting details, each as a separate permission. It cannot change anything.
- It never gets audio, a recording in progress, or meeting join links.
- View access log shows which recordings each assistant read, never their contents, and Revoke ends its access at once.
- The assistant keeps its token in its own settings. Treat those settings as sensitive, and do not reuse one token for another client.
Manual setup
For troubleshooting, the connection window’s Copy manual configuration gives a standard stdio entry with your real path and token:
{
  "command": "/path/to/stenograf-mcp",
  "env": {
    "STENOGRAF_MCP_ACCESS_TOKEN": "..."
  }
}
Any client that runs stdio MCP servers takes the same entry: Cursor and Windsurf under mcpServers in their mcp.json, VS Code under servers in its mcp.json, Gemini CLI under mcpServers in ~/.gemini/settings.json. Stenograf registers Claude Code and Codex for you; for the others, paste the entry by hand.